How to Display Success Stories That Actually Convert

The best way to display success stories is simple: lead with the outcome, back it with one verifiable metric, and use a tiered layout that lets skimmers grab the headline while serious buyers dig into full proof. Bury the number, and you’ve wasted the whole story. Lead with it, and you’ve built the most persuasive asset in your marketing stack.
Here’s what you can put into action today:
- Write a headline that states the result, not the topic. “How Meridian Cut Onboarding From 9 Days to 2” beats “A Customer Success Story” every time.
- Attach one verified metric near the top of the page, whether it’s a percentage lift, a time saved, or a dollar figure. One real number beats five vague adjectives.
- Show a verifiable name, photo, and link (a LinkedIn profile, a company logo, a title). Anonymous quotes read as filler; named ones read as proof.
A large share of B2B buyers weigh customer testimonials and case studies heavily when deciding who to buy from, which is exactly why the display matters as much as the writing. A platform like Clareefai exists precisely to solve the operational side of this problem: collecting the story, verifying the person behind it, and getting it in front of the right buyer segment without your team chasing approvals in a spreadsheet. Segmentation, as you’ll see below, is not optional if you want any of this to convert.
Key Takeaways
The most effective success stories lead with a verified outcome, target a specific buyer persona, and appear in a tiered display that rewards both skimmers and deep readers.
| Point | Details |
|---|---|
| Pick one anchor story | Choose your strongest customer with a clear, verifiable metric and publish it first. |
| Verify before you publish | Confirm the metric’s source and get written approval before any number goes live. |
| Build a tiered wall | Use one anchor testimonial, two mid-length quotes, and a grid of short cards. |
| Tag by persona and outcome | Make every story searchable by industry, role, and result type for sales use. |
| Track story usage in CRM | Add a story ID field so reps can log which story moved a specific deal. |
| Centralize with a platform | Tools like Clareefai handle approval tracking, tagging, and publishing in one system. |
Table of Contents
- How to Display Success Stories: Step 1, Define Purpose and Audience
- How to Choose the Right Customer and Get Their Buy-In
- What Evidence and Metrics Should You Collect First?
- How Do You Turn a Customer Interview Into a Story?
- How to Write and Format the Story So It Gets Read
- What’s the Best Way to Display Success Stories Visually?
- How Do You Promote and Repurpose a Success Story?
- How Do You Measure the Impact of a Success Story?
- Best Practices and Common Mistakes to Avoid
- Templates for Structuring and Publishing a Success Story
- Why Do Authentic, Segmented Success Stories Convert Better?
- How a Centralized Testimonial Platform Scales All of This
- Sources
How to Display Success Stories: Step 1, Define Purpose and Audience
Every success story needs a job before it needs a sentence. Decide the primary conversion goal first: are you trying to drive demo requests, keep someone on your pricing page longer, or hand sales a reference they can point to mid-negotiation? Secondary goals matter too. SEO traffic, press pickup, and even customer retention (showing existing clients they made the right call) are all legitimate reasons to publish a story, but they should never be the reason you skip defining a primary one.
Once you know the goal, map the story to a buyer persona and a funnel stage. A story aimed at an awareness-stage visitor should read fast and lean on a big, simple number. A story for someone deep in evaluation, maybe comparing three vendors, needs a longer version with implementation detail, a rollout timeline, and a named contact willing to take a reference call. Publishing the same one-size-fits-all case study to every stage of the funnel is one of the most common reasons case studies underperform.
Before a story goes anywhere near your CMS, run it against a simple checklist:
- At least one metric that can be independently verified (a dashboard screenshot, a CSV export, or a signed-off number from the customer).
- Written permission to use the customer’s name, title, and company.
- A named person with a real role, not “a satisfied client.”
- A defined measurement timeframe (30 days, one quarter, a full year).
Write a short internal brief for each story: two sentences on what success looked like numerically, and two more on what it looked like qualitatively (fewer support tickets, a calmer renewal conversation, a champion who got promoted). That qualitative color is often what makes the metric believable.
How to Choose the Right Customer and Get Their Buy-In
Not every happy customer makes a good story. The ideal candidate matches a persona you’re actively trying to reach, has a clean before-and-after metric, is willing to spend 30 to 45 minutes on a call, and works somewhere with permissive (or at least workable) brand guidelines. A customer who loves you but works at a company with an airtight legal review process will slow your timeline to a crawl. Weigh that before you invest in the outreach.

A short, specific outreach email outperforms a generic one almost every time. Reference the exact result you noticed (“I saw your team cut ticket volume by a third after rollout”) rather than a vague “we’d love to feature you.” Offer something concrete in exchange: early visibility with their own customers, a link back to their site, or simply the chance to review and approve every word before it goes live. That approval offer alone resolves a lot of hesitation.
Before you write a single sentence, get the following confirmed in writing:
- Full name, title, and company name as they want it displayed.
- Exact quote language they’re approving (not a paraphrase they’ve never seen).
- Logo usage rights, separate from name and quote rights.
- Screenshot and dashboard image approval, if you’re showing their data visually.
- Video rights, if applicable, including where the video can be distributed.
- Permission to link to their LinkedIn profile for verification.
Some brands restrict logo use even when the individual is thrilled to participate. When that happens, fall back to a photo paired with a LinkedIn link. It still gives readers a real person to verify, which does most of the credibility work a logo would have done. Partial approvals (quote yes, metric no; metric yes, name no) are common. Publish what’s approved and hold the rest for a future update rather than letting one restriction kill the whole story.
What Evidence and Metrics Should You Collect First?
A story is only as strong as the data behind it, and the data collection step is where most teams cut corners. For every metric you plan to publish, capture the baseline (what the number looked like before), the result (what it looks like now), the measurement window (30 days? A full quarter?), the source (a dashboard, an invoice, a CSV export), and the name of the person who can verify it if a prospect asks.
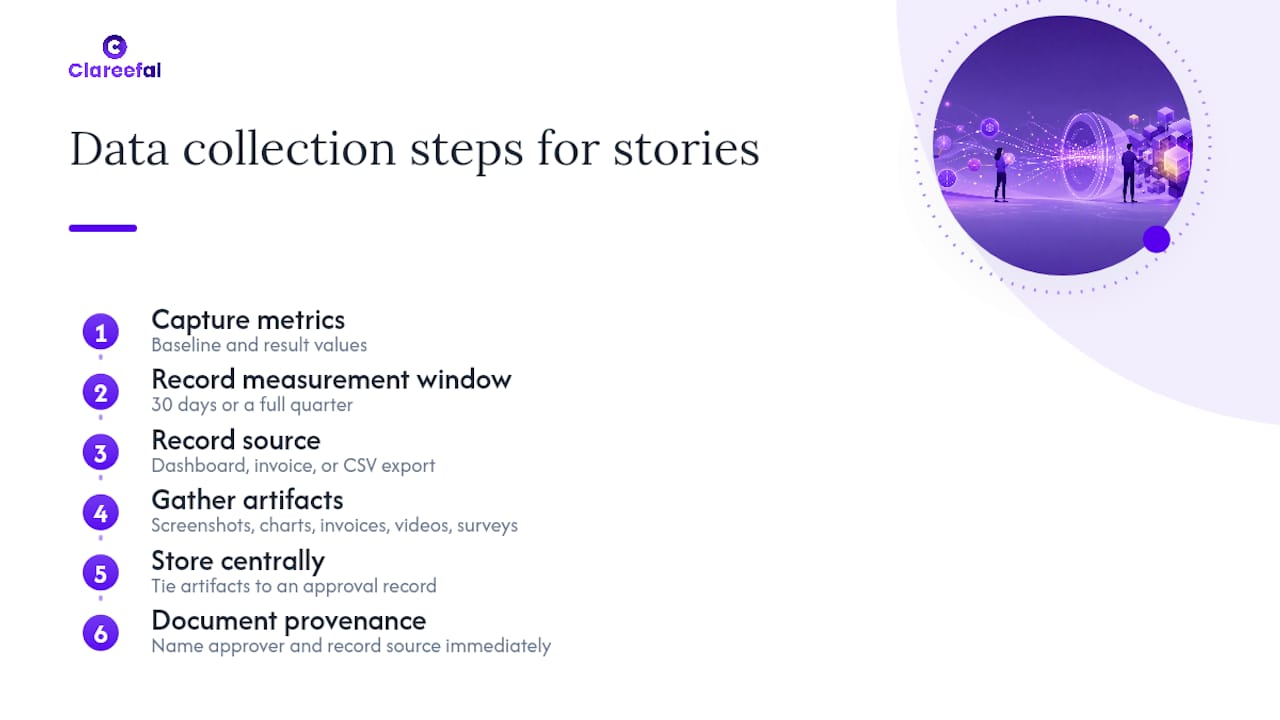
Gather the artifacts while the customer is still engaged and motivated to help. That means screenshots of relevant dashboards, exported charts, invoices showing cost changes, before-and-after product screenshots, and any survey data the customer is willing to share. Video clips from the interview, even rough ones, are worth capturing now rather than trying to schedule a second call later. Store everything in one place tied to an approval record so nothing gets published without a clear chain of custody.
Precision in phrasing matters more than most writers realize. “Reduced onboarding from 9 days to 2 days” is a claim a reader can picture and a prospect can push back on if it’s wrong, which is exactly why it’s more persuasive than “dramatically faster onboarding.” Vague language reads as marketing. Specific language reads as proof.
Pro Tip: Document data provenance the moment you collect it, not when you’re ready to publish. A metric with no clear source and no named approver is the first thing legal or a skeptical prospect will challenge.
How Do You Turn a Customer Interview Into a Story?
The interview is the step most teams rush, and it’s also the step that determines whether your final story sounds real or reads like a template. A well-run 30 to 45 minute call, guided by the right questions, produces both the hard metrics and the human detail that make a story worth reading.
Twelve questions that consistently produce usable material:
- What did the situation look like before you started working with us?
- What specifically pushed you to look for a new solution?
- What other options did you consider, and what made you choose us?
- Who was involved in the decision, and what mattered most to them?
- What did the rollout or onboarding process actually look like?
- What was the first moment you noticed things were working?
- Can you name a specific number that changed? What was it before and after?
- Over what time period did that change happen?
- How has your day-to-day work changed since implementation?
- Would you be willing to have that metric verified through a dashboard or report?
- What would you tell a peer considering the same decision?
- Is there anything about working with us that surprised you?
Every question earns its place. Questions 1 through 4 surface the challenge and decision moment. Questions 5 through 9 build the timeline and the metric. Questions 10 through 12 produce the quotable, forward-looking material that closes the story.
Structure what you gather using six beats: the customer and their goal, the challenge they faced, why they chose you over alternatives, how the rollout went, the measurable results, and a forward-looking quote. This sequence mirrors what makes a case study credible: a clear before-and-after, a named customer, and results a reader can verify.
When it comes to quotes, record the call with permission and ask direct follow-ups for specifics (“You said things got easier, can you give me a number?”). Draft the quote in the customer’s own words and phrasing, not a polished marketing rewrite, then send it back with the exact source of any metric attached so they can approve both the language and the number in one pass.
- Record every interview with explicit consent.
- Ask at least one follow-up question per answer to push past generalities.
- Draft quotes close to verbatim, then send for written approval alongside the metric source.
How to Write and Format the Story So It Gets Read
A headline that states the result outperforms a headline that states the topic. “Meridian Case Study” gets skipped. Pair that headline with a one or two sentence TL;DR near the top: who the customer is, what changed, and over what timeframe. Readers should understand the entire outcome before they’ve scrolled once.
Scannability rules that matter more than clever copy: lead with the result, not the company background. Pull your key numbers into bold text so they’re visible even to someone scanning at speed. Use short subheads that mirror the six story beats (Challenge, Decision, Rollout, Results). Pull one strong quote into a visual callout so readers who skip the body still catch the human voice behind the numbers.
On the technical side, a few small choices compound. Use a clear H1 and H2 hierarchy so search engines and skimmers both understand the page’s structure. Write descriptive alt text for every dashboard screenshot rather than leaving it blank. Keep URLs short and include a version of your primary keyword phrase where it fits naturally, rather than the exact match crammed into a slug.
Keep the customer as the hero throughout. Avoid language that sounds like it came from a brochure, and quote the customer using their actual vocabulary rather than smoothing it into generic marketing phrasing. A story that reads like an ad gets treated like one. A story that reads like a real account of what happened gets read to the end, with the customer at the center of the narrative rather than as a prop for your product.
What’s the Best Way to Display Success Stories Visually?
The tiered testimonial wall remains one of the most effective display patterns available, and it works because it matches how people actually read a page: they skim first, then slow down when something catches their attention. Structure it with one full-width anchor testimonial (roughly 120 words, paired with a photo and a labeled metric), two mid-length testimonials placed side by side beneath it, and a grid of four or more short quote cards below that. Each anchor should carry a verification cue, a real photo that matches the person’s public profile, a title, and a company name.

Beyond the homepage wall, build modular case-study blocks you can drop into product pages, pricing pages, and landing pages: an outcome headline, two or three key metrics with clear labels, a short quote, a photo or logo, and a call to action. These modular blocks do a lot of quiet conversion work because they show up exactly where a prospect is already deciding.
Match the format to the moment:
- Full case study page: for deep-dive evaluation, when a prospect is comparing vendors seriously.
- One-page PDF: for sales decks and email attachments during active deals.
- 30 to 60 second video: for social proof and top-of-funnel awareness.
- Small widget: for pricing pages and checkout flows, where a prospect needs one last nudge.
Design specs worth locking down ahead of time: keep hero images consistent in aspect ratio, use square avatars sized the same way across every testimonial, and never let a logo and a photo compete for space in the same card. Testimonial walls redesigned around this tiered, outcome-labeled structure have shown material gains in engagement time and demo bookings on live sites, which makes the layout worth the design hours it takes to get right.
Pro Tip: Ask every featured customer for the exact photo they use on LinkedIn. A mismatch between your testimonial wall and their public profile is a small thing that quietly erodes trust the moment a prospect checks.
How Do You Promote and Repurpose a Success Story?
One well-built story should never live on a single page. Turn it into a short social post that leads with the headline metric, a one-slide sales card reps can drop into a deck, an email snippet for nurture sequences, and an ad creative built around the strongest quote. Prioritize by channel: sales decks and email get the metric-forward version, social gets the human quote, and paid ads get whichever single number tested best.
Sales enablement is where a lot of good stories quietly die on the vine, usually because reps can’t find them fast enough mid-call. Give your sales team a shortlink to each story, a one-paragraph buyer-facing summary they can paste into an email, short recorded quote clips they can use as call-openers, and a light script for actually booking a reference call once a prospect asks for one.
On the content operations side, maintain a searchable system tagged by persona, industry, outcome type, and funnel stage, so a rep working an enterprise healthcare deal isn’t scrolling through twenty stories about small e-commerce brands. That tagging discipline is what separates a testimonial library that actually gets used from one that becomes a graveyard of unread PDFs, and it’s a core piece of what a feedback contextualization workflow is built to solve.
Time your amplification around moments when a story naturally resonates: product launches, renewal season, or an active enterprise RFP cycle. Coordinate with paid channels so a strong story isn’t just sitting on your site, it’s actively running as a retargeting ad to warm prospects who’ve already shown interest.
How Do You Measure the Impact of a Success Story?
Two categories of KPIs matter here, and conflating them is a common mistake. Primary KPIs tie directly to revenue: demo requests generated, the lift in MQL-to-SQL conversion when a story is involved, time-to-demo after someone reads a story, and win-rate lift on deals where a rep actively used the story as a reference point.
Engagement KPIs tell you whether the story itself is doing its job before it ever reaches a deal: time spent on the section, click-throughs from the story to your pricing page, scroll depth on longer case study pages, and video view-through rate for any video testimonial.
A simple tracking plan makes all of this attributable instead of anecdotal:
- Build a distinct UTM structure for every distribution channel (email, social, paid, sales-shared link).
- Give each published story its own landing page ID so performance is trackable independent of the channel that drove the click.
- Add a “story ID” field to your CRM so a rep can log exactly which story they shared with a prospect.
- Add a “story-used-flag” field to mark deals where a story was part of the sales conversation.
- Run a simple A/B test, one landing page variant with the story, one without, and compare conversion rate over a fixed window.
Before publishing any number externally, walk through a short validation checklist: confirm the source is documented, confirm the customer approved the exact figure in writing, and confirm the measurement window is stated clearly enough that a skeptical reader could ask a follow-up question and get a real answer.
Best Practices and Common Mistakes to Avoid
The teams that get the most mileage out of their success stories share a few habits: they segment stories by persona and industry before publishing, they lead every asset with the outcome instead of the company background, they verify every number before it goes live, and they ask for approval early in the process rather than after a full draft is written. They also make sure every photo matches the customer’s public LinkedIn or company profile, because a mismatch is a small detail that a sharp-eyed prospect will notice.
The mistakes are just as consistent. A wall of identical, short, generic quotes (“Great product, would recommend!”) does nothing for credibility and actually signals the opposite. Vague metrics (“significant improvement”) read as marketing filler rather than proof. Over-polished language that sounds like it was written by a copywriter instead of spoken by a real customer breaks the trust the story was supposed to build. And publishing a number with no visible source, no timeframe, and no named approver is the single fastest way to get a story flagged as unreliable by a careful buyer.
Build a light editorial review process around this: one person owns final metric verification, one person owns legal and brand approval, and stories get refreshed or retired on a set schedule (quarterly is reasonable for most B2B teams) so nothing stale stays on a live page.
Pro Tip: If a metric feels impressive but you can’t name the exact source behind it, don’t publish it yet. An unverifiable number is worse for your credibility than no number at all.
Templates for Structuring and Publishing a Success Story
A reusable template turns this whole process from a one-off writing project into a repeatable content operation. Structure every case study around the same six-beat table so your team, and eventually your CMS, can fill it in consistently.
| Story Beat | What to Include | Approval Needed |
|---|---|---|
| Customer & goal | Company name, role, industry, and the goal they came in with | Name, title, company approval |
| Challenge | Specific pain point, quantified if possible | Metric source confirmation |
| Decision | Why they chose you over alternatives considered | Quote approval |
| Rollout | Timeline, key milestones, who was involved | None required |
| Results | Baseline metric, result metric, measurement window | Written metric approval |
| Forward-looking quote | A quote a peer would find persuasive | Final quote sign-off |
Use the same twelve-question interview script from earlier as your standard operating document, and attach exact permission language to it: something as simple as “I approve the use of my name, title, company, and the following quote and metrics for marketing purposes” covers most of what you need in writing.
Before anything publishes, run through this checklist:
- Confirm every metric has a documented source and a named internal approver.
- Confirm legal and brand approvals are on file, not just verbally agreed to.
- Confirm image and video rights are documented separately from quote approval.
- Insert UTM tracking codes before the page or asset goes live.
- Tag the story in your CMS by persona, industry, outcome type, and funnel stage.
Export this structure as a shared document or a simple PDF your whole team can duplicate for each new story, and if you’re managing more than a handful of active stories, keep them in a dedicated testimonial collection rather than scattered across marketing folders. Emory’s public health success story guide offers a useful outside model for how a structured template forces consistency even across very different storytellers.
Why Do Authentic, Segmented Success Stories Convert Better?
The influence of case studies on B2B buying isn’t a marginal effect. A large majority of B2B buyers weigh testimonials and case studies as highly influential in their purchasing decisions, which means a weak or generic display isn’t just a missed opportunity, it’s actively underperforming against buyer expectations that are already set high.
Segmentation is the other half of the equation that gets overlooked. Microsoft’s guidance on internal adoption programs makes a point that applies just as well externally: success stories drive real behavior change when they highlight a specific maker’s journey and a tangible business metric, not a generalized win. The same logic holds for prospects. A healthcare buyer wants to see a healthcare story. A 50-person startup doesn’t relate to a case study about a 5,000-person enterprise rollout, even if the product is identical.
Redesigning a testimonial wall into a tiered, outcome-labeled layout, rather than a flat scroll of identical quotes, turned a section prospects used to skip into one of the highest-engagement areas on the page, with a measurable lift in demo bookings.
That finding, drawn from a practitioner’s live rebuild of a Webflow testimonial wall, backs up something intuitive once you see it: structure and specificity do more work than volume. Ten generic quotes convert worse than three well-verified, outcome-labeled ones.
A practical segmentation schema to apply across your library: industry, company size, buyer role, and outcome type (cost savings, time savings, revenue growth, retention improvement). Tag every story against all four dimensions, and you’ve built something your sales team can actually search instead of scroll through.
Author’s Perspective: Practical Tips From Running Testimonial Programs
Three habits separate teams that build a real library of proof from teams that publish a handful of stories and let the program stall. Ship three strong anchor testimonials first instead of waiting for twenty mediocre ones. Require one verified metric before a story is eligible for publication, no exceptions, because a story without a number is an opinion, not proof. And standardize your photo request as part of the very first outreach email, so you’re never chasing it later after the customer has mentally moved on.
Operationally, a weekly triage of candidate stories keeps the pipeline moving instead of piling up in someone’s inbox. A monthly refresh of your top three or four assets, swapping a stale metric for a fresher one, keeps your homepage from looking frozen in time. And it’s worth being explicit about who owns what: marketing usually owns the writing and display, customer success usually owns the relationship and the ask, and sales owns getting the reference call scheduled once a prospect wants one. Without that split written down somewhere, stories fall into the gap between teams.
Pushback happens more than people expect, and most of it is manageable. Privacy concerns are real, and a customer who won’t let you use their name can often still let you use their industry, company size, and a first name. Brand restrictions on logos are common in regulated industries; a photo and a LinkedIn link almost always satisfy the same trust signal a logo would have. The goal isn’t to force every customer into the same format. It’s to preserve enough authenticity that the story still reads as real, even when you’ve had to work around a restriction.
How a Centralized Testimonial Platform Scales All of This
Everything above works, but doing it manually across dozens of customers, spreadsheets, and Slack threads is where most programs quietly fall apart. Approvals get lost, tagging never happens consistently, and by the time a rep needs a healthcare reference for a Friday call, nobody remembers which of the twelve case studies actually fits.
Clareefai centralizes exactly the operational pain points that slow this process down: collecting written approvals in one system instead of scattered email threads, tagging every story by persona and outcome automatically, publishing display-ready widgets without a developer, and tracking which stories sales actually used inside your CRM. It’s built for the workflow this article just walked through, not a separate one you’d have to adapt to. If you’re evaluating a platform, ask on a demo how it handles approval tracking, whether tagging is automatic or manual, and how it surfaces the right story to a rep mid-deal. A centralized system also shortens time-to-publish considerably, since a verified testimonial can move from collection to a live customer profile without passing through five separate tools. Explore the full platform to see how testimonial collection, verification, and publishing work together, or look at how unified testimonial management has moved the needle on win rates for teams running the same playbook you just read.
Sources
For teams building this out further, a few sources are worth bookmarking. Forbes’ guide to showcasing client success backs the case for prioritizing testimonials as a conversion asset. Forbes’ companion piece on writing stories sales will actually use is worth reading for the sales-facing framing. Storyflow’s step-by-step case study guide covers interview technique in more depth than fits here. Microsoft’s adoption guidance applies the same principles to internal storytelling. Pravin Kumar’s testimonial wall rebuild is the best practical reference for the tiered display pattern. Emory’s success story development guide offers a downloadable template structure. Avintiv Media’s piece on writing stories people actually read is a strong reference for narrative voice, and Babylovegrowth’s storytelling and brand engagement guide rounds out the craft side of this playbook.
- 17 Ways To Showcase Client Success And Attract More Business | Forbes
- Show and tell - Power Platform adoption guidance | Microsoft Learn
- How to Write a Case Study (2026 Step-by-Step Guide) | Storyflow
- How I Designed a Webflow Testimonial Wall That Actually Convinces Skeptical Founders in 2026 | Pravin Kumar
- Developing A Success Story (PDF) | Emory Centers for Public Health Training
Recommended
Share Article
Stay Updated
Get the latest insights on customer advocacy and SaaS growth delivered to your inbox.